
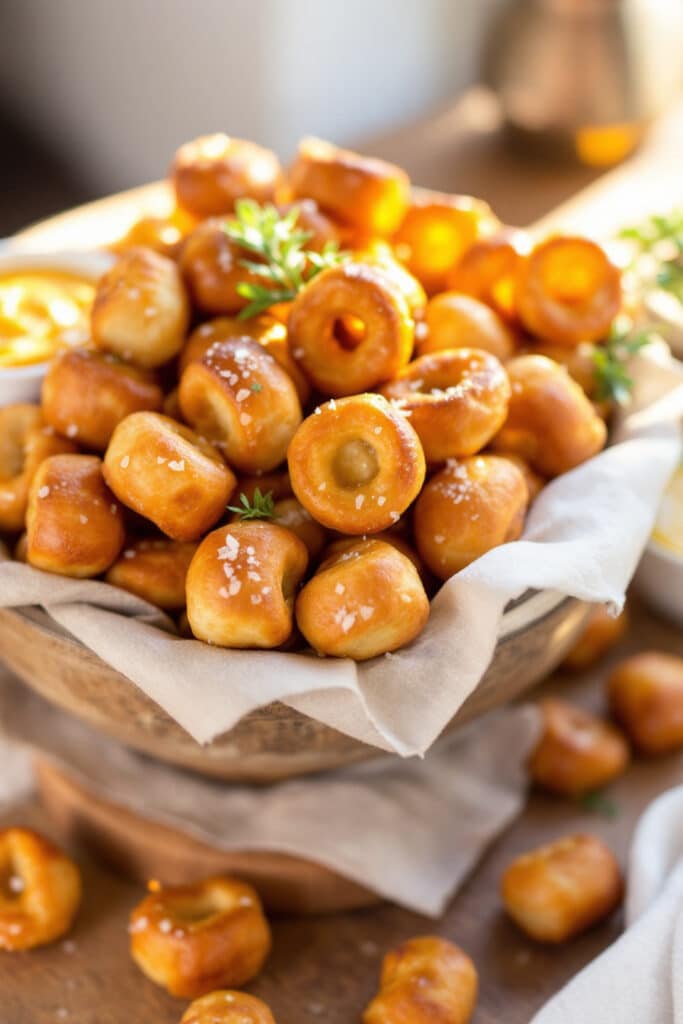
Have you ever stared at that jar of sourdough discard sitting in your fridge, wondering what to do with it? You’re not alone. It’s a common struggle among sourdough bakers. But what if I told you that you can turn that discard into delicious, chewy pretzel bites? That’s right! Sourdough discard pretzel bites are not just a creative use of leftovers; they’re a delightful snack that everyone will love.
What makes this recipe special? It’s the unique flavor profile that comes from the sourdough discard, which adds a tangy depth to the pretzel bites. Plus, they’re surprisingly easy to make! This recipe uses simple ingredients that you probably already have at home, making it a perfect way to reduce waste while treating yourself. Let’s dive into the details.
Ingredients & Substitutions
Essential Ingredients
- Sourdough Discard: This is the star of the show! Make sure it’s unfed, as it will add the necessary flavor and fermentation.
- All-Purpose Flour: Provides structure and chewiness.
- Baking Soda: Essential for the boiling solution, giving pretzels that classic flavor and dark color.
- Butter: Adds richness. Unsalted is best, so you can control the saltiness.
- Salt: Enhances flavor; don’t skip it!
- Water: Warm water activates the yeast, helping to bring the dough together.
- Brown Sugar: For a hint of sweetness and to help with fermentation.
Quality Substitutions
- Flour: You can use bread flour for a chewier texture, or whole wheat flour for more fiber.
- Butter: For a dairy-free option, use vegan butter or olive oil.
- Sugar: Honey or maple syrup can work as a substitute for brown sugar.
When selecting ingredients, go for fresh. Fresh sourdough discard is ideal for flavor. Aged discard may not provide the same tangy goodness.

Step-by-Step Instructions
Preparing the Dough
- Combine Ingredients: In a large mixing bowl, combine your sourdough discard, warm water, and brown sugar. Mix until the sugar dissolves.
- Add Flour and Salt: Gradually add all-purpose flour and salt. Stir until a dough begins to form. You want it to be a bit sticky but manageable.
Kneading
- Knead the Dough: Transfer the dough to a lightly floured surface. Knead for about 5-7 minutes until the dough is smooth and elastic. If it’s too sticky, sprinkle a little more flour as needed.
Rising Time
- Let It Rise: Place the dough in a greased bowl, cover it with a damp cloth, and let it rise in a warm spot for about 1 hour, or until it doubles in size. This fermentation step enhances flavor and texture.
Shaping the Pretzel Bites
- Preheat the Oven: While the dough is rising, preheat your oven to 425°F (220°C).
- Divide the Dough: Once risen, punch the dough down to release the air. Divide it into small pieces, about 1-2 inches each. Roll each piece into a ball.
Boiling the Bites
- Prepare the Boiling Solution: In a large pot, bring about 10 cups of water to a boil. Add 2/3 cup of baking soda. This will give your pretzel bites that signature flavor and color.
- Boil the Bites: Drop the dough balls into the boiling water, a few at a time. Boil for about 30 seconds, then remove with a slotted spoon. Place them on a parchment-lined baking sheet.
Baking
- Brush with Butter: After boiling, brush the bites with melted butter for flavor and to aid browning.
- Bake: Bake in the preheated oven for 12-15 minutes, or until golden brown.
Expert Tips
- Avoid Overcrowding: When boiling, ensure you don’t overcrowd the pot. This can lead to uneven cooking.
- Check Doneness: The bites should be golden brown. If they’re too pale, they might not have developed enough flavor.
Variations
Want to spice things up? Add a teaspoon of garlic powder to the dough for an extra kick. For a cheesy version, fold in some shredded cheese before shaping the bites.
Cooking Techniques & Science
Understanding the science behind pretzel-making is fascinating. Boiling the pretzel bites in baking soda water is a crucial step. This alkaline environment helps develop the Maillard reaction during baking, resulting in that classic pretzel flavor and deep brown color.
Kneading the dough is also important. It develops gluten, which gives the pretzel bites their chewy texture. The fermentation from the sourdough discard adds depth of flavor, making these bites unique.
Tools You’ll Need
- Mixing Bowls: For combining and rising the dough.
- Slotted Spoon: Essential for removing the pretzel bites from the boiling water.
- Baking Sheet: Parchment-lined for easy cleanup and to prevent sticking.
Serving & Pairing Suggestions
Presentation can elevate your dish. Serve the pretzel bites on a wooden board, sprinkled with coarse sea salt. A side of mustard or cheese dip makes the perfect accompaniment.
For drinks, pair these bites with a light beer or a refreshing sparkling water with lime. If you’re feeling indulgent, a glass of white wine can complement the flavors beautifully.
Conclusion
Sourdough Discard Pretzel Bites are not just a clever way to use leftovers; they’re a delicious snack that everyone will adore. The combination of chewy texture and tangy flavor makes them irresistible.
Remember, the key to success lies in the fermentation and boiling steps. Don’t rush the process. Enjoy the transformation of simple ingredients into something special.
Final Tips
- Leftovers: Store any uneaten bites in an airtight container. They can be reheated in the oven to regain their crispy exterior.
- Experiment: Don’t hesitate to try different seasonings or dips. The possibilities are endless!
FAQs
1. Can I use active sourdough starter instead of discard?
Yes! Just make sure it’s unfed, as that will give the best flavor.
2. How can I make these pretzel bites healthier?
You can substitute whole wheat flour for all-purpose flour and use less butter.
3. Can I freeze the pretzel bites?
Absolutely! Freeze them before baking. When ready to eat, bake them straight from the freezer, adding a few minutes to the baking time.
4. What’s the best way to store leftovers?
Keep them in an airtight container in the fridge for up to three days. Reheat in the oven for a few minutes to restore their texture.
5. Can I make these bites ahead of time?
Yes! You can prepare the dough and let it rise, then shape and boil them just before baking for fresh bites.

Catherine Frank is the creative force behind FoodieGrandie.com, a cozy corner of the internet where she shares her love for home-cooked meals. From hearty dinners to sweet desserts, her recipes bring warmth and flavor to every table. Passionate about simple, delicious food, Catherine turns everyday meals into memorable moments.