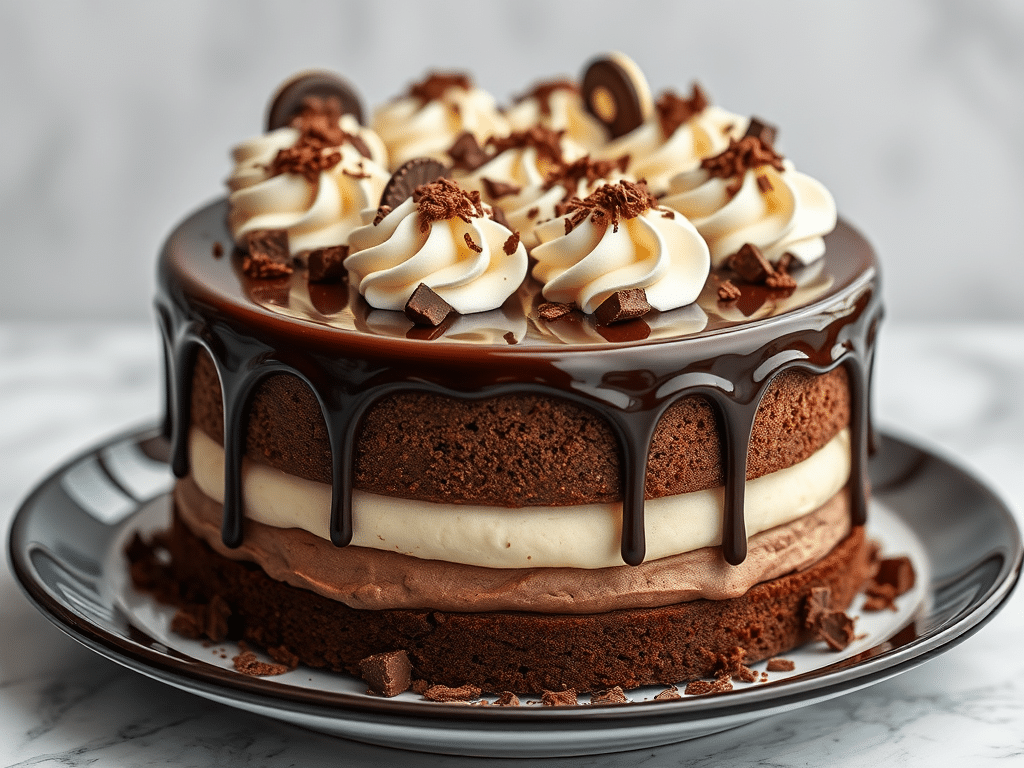
There’s somethin’ magical about the moment a spoon breaks through three distinct layers of chocolate perfection. That first bite—where dense chocolate cake meets airy dark chocolate mousse meets silky white chocolate cream—might just change your dessert game forever. I’ve spent twenty years perfecting this recipe in professional kitchens across Europe and America, and I’m still captivated by its elegant simplicity and show-stopping presence.
Triple chocolate mousse cake isn’t just another dessert. It’s an experience that transforms ordinary dinners into memorable occasions. The contrast between textures and chocolate intensities creates a symphony of flavor that builds with each bite, never overwhelming but always satisfying.
Ingredients & Substitutions
For the Chocolate Cake Base:
- 170g high-quality dark chocolate (70% cocoa solids)
- 115g unsalted butter, room temperature
- 150g granulated sugar
- 3 large eggs, room temperature
- 1 tsp vanilla extract
- 120g all-purpose flour
- 30g unsweetened cocoa powder
- ½ tsp baking powder
- ¼ tsp salt
- 60ml strong brewed coffee, cooled
The foundation of our masterpiece begins with chocolate selection. Dont settle for cheap cooking chocolate—the quality of your cocoa solids directly impacts your final flavor profile. I find Venezuelan or Ecuadorian chocolates offer complex fruity notes that elevate the entire dessert. If you’re dairy-free, coconut oil can replace butter, though you’ll notice a slight texture difference. The coffee doesn’t make the cake taste like mocha—it intensifies the chocolate flavor through chemical reaction. If you’d rather avoid it, substitute with warm water.
For the Dark Chocolate Mousse:
- 225g high-quality dark chocolate (60-65% cocoa)
- 480ml heavy cream, divided
- 3 large egg yolks
- 50g granulated sugar
- 2 tbsp water
- 1 tsp gelatin powder
- 2 tbsp cold water
This middle layer demands a slightly sweeter chocolate than the base—I’ve found 60-65% cocoa provides ideal balance. For those avoiding gelatin, agar-agar works beautifully at a 1:1 ratio, tho you’ll need to activate it differently by boiling with liquid. I divide the cream here because part serves as the base while the remainder gets whipped for that signature lightness. Use pasteurized eggs if you’re concerned about consumption risks.
For the White Chocolate Mousse:
- 200g high-quality white chocolate
- 360ml heavy cream, divided
- 1 tsp gelatin powder
- 2 tbsp cold water
- ½ tsp vanilla extract
White chocolate quality varies dramatically between brands. Look for those containing actual cocoa butter rather than vegetable oils—you’ll immediately taste the difference. A touch of vanilla enhances white chocolate’s natural fragrance without overwhelming. For a dramatic presentation variation, replace this layer with ruby chocolate for a striking pink contrast.
For the Optional Glaze:
- 115g high-quality dark chocolate (55-60% cocoa)
- 120ml heavy cream
- 1 tbsp light corn syrup
- 1 tsp vanilla extract
This finishing touch creates that coveted professional shine. Light corn syrup ensures perfect glossiness—honey makes an excellent substitute with a slightly different flavor profile. The slightly lower cocoa percentage chocolate ensures the glaze doesn’t overwhelm the mousse layers beneath it.
Step-by-Step Instructions
Preparing the Chocolate Cake Base:
- Preheat your oven to 175°C (350°F) and prepare a 23cm (9-inch) springform pan by lining the bottom with parchment and greasing the sides.
- Melt chocolate and butter together using a double-boiler or microwave in 30-second bursts, stirring between intervals. Allow to cool slightly. Many home bakers rush this step—patience here prevents scrambling your eggs in the next step.
- Whisk sugar and eggs until pale and slightly thickened, about 2 minutes. Don’t overbeat as we’re not making a sponge cake.
- Fold in the melted chocolate mixture and vanilla extract until just combined. Over-mixing activates gluten and tuffens the cake—exactly what we don’t want.
- Sift together flour, cocoa powder, baking powder, and salt, then gently fold into the batter. The sifting stage eliminates cocoa lumps that would otherwise be impossible to incorporate smoothly.
- Stir in the cooled coffee until just combined. Pour batter into the prepared pan and smooth the top with an offset spatula.
- Bake for 20-25 minutes, or until a toothpick inserted comes out with a few moist crumbs attached. Don’t wait for a completely clean toothpick—that indicates overcooking! The cake will continue baking from residual heat.
- Cool completely in the pan. Once cooled, run a thin knife around the edge before releasing the springform. This creates a clean edge for your mousses.
When baked correctly, this layer should be slightly fudgy—denser than a typical cake but not quite a brownie. It provides the perfect sturdy foundation for our delicate mousses. Common mistake: removing the cake from the pan before building the remaining layers. Keep it in there!
Creating the Dark Chocolate Mousse:
- Sprinkle gelatin over 2 tablespoons cold water in a small bowl and let stand for 5 minutes to bloom. Proper blooming is critical—if the gelatin doesn’t fully hydrate now, you’ll get unpleasant granules in your finished mousse.
- Melt the dark chocolate in a heatproof bowl over simmering water or in 30-second microwave bursts. Allow to cool slightly but remain fluid.
- In a separate small saucepan, combine egg yolks, sugar, and 2 tablespoons water. Cook over low heat, whisking constantly, until mixture reaches 70°C (160°F) on an instant-read thermometer. This temperature safely pasteurizes the eggs without scrambling them.
- Remove from heat, add bloomed gelatin, and whisk until completely dissolved. The residual heat from your egg mixture should be sufficient to melt the gelatin.
- Immediately whisk the egg mixture into the melted chocolate until smooth and fully incorporated. If working in a cool kitchen, do this quickly before the chocolate begins to set.
- Whip 240ml of the heavy cream to medium-soft peaks. Don’t overwhip—we want it firm enough to provide structure but soft enough to fold seamlessly.
- Heat the remaining 240ml cream until just warm, then whisk into the chocolate mixture. This technique—adding warm cream directly to chocolate—creates a beautiful emulsion that prevents seizing.
- Gently fold in the whipped cream using a large spatula, maintaining as much air as possible. Over-folding deflates your mousse and loses that crucial light texture.
- Pour over the cooled cake layer and smooth the top. Refrigerate for at least 1 hour until set. The mousse should be firm enough to support the white chocolate layer without mixing.
Perfecting the White Chocolate Mousse:
- Repeat the gelatin blooming process with cold water as before.
- Melt white chocolate with 120ml of heavy cream in a heatproof bowl over simmering water, stirring until smooth. White chocolate burns more easily than dark, so watch carefully and keep heat gentle.
- Remove from heat and stir in the bloomed gelatin until fully dissolved. Allow to cool to room temperature—approximately 10 minutes. Too hot and it’ll collapse your whipped cream; too cool and it’ll seize.
- In a separate bowl, whip the remaining 240ml heavy cream and vanilla extract to medium peaks.
- Gently fold the whipped cream into the white chocolate mixture in three additions. The first addition can be more vigorous to “lighten” the base; subsequent additions should be extremely gentle.
- Pour over the set dark chocolate mousse layer and smooth the top. Refrigerate for at least 4 hours, preferably overnight. This extended chilling time allows flavors to meld while ensuring clean slices.
Optional Glaze Finish:
- Heat heavy cream in a small saucepan until it just begins to simmer. Pour over the chopped chocolate and let stand for 2 minutes.
- Stir until smooth, then add corn syrup and vanilla. The corn syrup creates that professional mirrorlike finish that elevates presentation.
- Allow to cool until the glaze reaches about 35°C (95°F)—warm but not hot. A too-hot glaze melts your mousses; too cool and it won’t pour smoothly.
- Pour over the chilled cake, tilting to ensure complete coverage. Return to refrigerator for 30 minutes to set.
This glazing stage transforms an already elegant dessert into a professional masterpiece. The thin layer adds textural contrast while sealing in moisture. Pro tip: pour glaze in one steady motion from the center rather than multiple additions.
Cooking Techniques & Science
The magic of triple chocolate mousse cake lies in its precise temperature control throughout preparation. Chocolate’s crystalline structure means it sets differently depending on how it’s cooled. Gradual chilling creates smaller, more refined crystals for that signature silky mouthfeel. That’s why we always refrigerate rather than freeze between layers.
Emulsification plays a crucial role in mousse stability. When we incorporate fats (chocolate) with water-based ingredients (cream), we’re creating thousands of microscopic bubbles that must remain suspended. The gelatin provides insurance against separation while egg proteins in the dark chocolate layer create additional structure.
The distinct layers remain separate due to careful temperature management. Each layer must set completely before adding the next—patience is non-negotiable. Professional pastry kitchens often use blast chillers to accelerate this process, but home refrigerators work perfectly given enough time. Rushing results in blurred boundaries between layers.
Air incorporation techniques differ between layers. The dark chocolate mousse contains egg yolks for richness and structure, while the white chocolate layer relies solely on whipped cream for its lightness. This creates textural progression from dense base to ethereal top layer.
Serving & Pairing Suggestions
When unmolding, warm the exterior of your springform briefly with a kitchen torch or hot towel to release cleanly. Slice with a hot, thin knife, wiping between cuts for pristine presentation. Let stand at room temperature for 15-20 minutes before serving—cold temperatures dull flavor compounds and mute chocolate’s complexity.
For plating, a light dusting of cocoa powder creates beautiful contrast against the white chocolate top. Alternatively, chocolate curls or fresh berries add texture and color. A thin gold leaf fragment turns this into a truly luxurious restaurant-quality dessert.
Wine pairings depend on which chocolate layer you wish to emphasize. For dark chocolate notes, a vintage port or Banyuls creates magical resonance. For those preferring to highlight the white chocolate, a late-harvest Gewürztraminer offers complementary floral notes. Coffee enthusiasts should serve with a medium-roast espresso—the bitterness balances the dessert’s sweetness perfectly.
For a complete dessert course, serve small portions (this cake is rich!) alongside fresh berries macerated with a touch of Grand Marnier, which cuts through the richness while enhancing the chocolate’s orange undertones.
Conclusion
Triple chocolate mousse cake represents the perfect marriage of technical skill and artistic expression. The careful layering of textures and chocolate intensities creates a dessert that’s greater than the sum of its parts. While it requires patience and attention to detail, the results are invariably worth the effort.
I’ve found this dessert particularly valuable for special occasions—it can be made completely in advance and actually improves with a day’s rest in the refrigerator as flavors meld. The visual impact when sliced cannot be overstated; few desserts elicit gasps of appreciation quite like this one.
For those looking to expand their pastry repertoire, mastering triple chocolate mousse cake teaches crucial techniques applicable across numerous desserts: tempering, emulsification, and textural contrast. Consider it a masterclass in chocolate work that yields deliciously impressive results.
FAQs
Can I make this cake without gelatin? Absolutely! Agar-agar makes an excellent vegetarian substitute at the same measurement, tho it needs to be fully boiled to activate. For a completely stabilizer-free version, increase the chocolate by about 15% and accept that the layers may be slightly softer when sliced.
Why did my mousse layers mix together? The most common culprit is insufficient chilling between layers. Each layer must be completely set—firm to the touch—before adding the next. Temperature management is crucial; your chocolate mixture should be cool enough not to melt the previous layer but warm enough to remain pourable.
How far in advance can I make this dessert? Triple chocolate mousse cake actually improves with time! You can prepare it up to 3 days ahead and keep refrigerated. The flavors develop complexity while resting. However, if using the glaze, apply that no more than 24 hours before serving for optimal shine.
My white chocolate mousse didn’t set properly. What happened? White chocolate contains less cocoa solids than dark, making its setting properties different. Ensure you’re using real white chocolate containing cocoa butter rather than compound chocolate or chips which contain stabilizers that prevent proper melting. Also check that your gelatin was fully bloomed and dissolved.
Can I freeze the finished cake? While possible, freezing slightly alters the delicate texture of the mousses. If you must freeze, do so without the glaze, wrapped tightly after fully set. Thaw overnight in the refrigerator, then glaze before serving.

Catherine Frank is the creative force behind FoodieGrandie.com, a cozy corner of the internet where she shares her love for home-cooked meals. From hearty dinners to sweet desserts, her recipes bring warmth and flavor to every table. Passionate about simple, delicious food, Catherine turns everyday meals into memorable moments.